Friday, October 29, 2010

Show Me Your Life-Guest Rooms

I've been on hiatus the past couple of weeks from Kelly's Show Me Your Life series. Mostly because it's been the office (which I'm not a huge fan of, decor wise. I'm just uninspired for it) and kids rooms (which we don't have any kids, therefore no kids rooms!). But this week is guest rooms and I LOVE ours! We've put a lot of work into it and I think it's turning out pretty special.


This is our guest bed. My dad built the night stands from this Knock-Off Wood design. I supervised one of them, mostly to learn about using a nail gun. My observations paid off because not only did I build the console table I shared a little while ago, but I also built the headboard! The headboard is from this Knock-Off Wood plan, except I ONLY built the headboard part. We have a frame already and I didn't really want the footboard.


Better look at the headboard


And a close-up of the nightstand. Forgive the blurry, yellow tinge. I am NOT a photographer, so I don't know how to adjust for different lighting.


Opposite from the bed is a dresser and quilt with stand. The stand was a Christmas present last year, so I had a better way of displaying the quilt. This quilt is pretty special. My great-aunt's great aunt handmade this quilt when she was in her 80s. It laid on the bed of my great-aunt (who was more of my grandmother, but that's a long story) and was one of the things she brought from home to her nursing home. It was on our guest bed for a time, but I was always worried something would happen to it.
The dresser also has a story. My several-times-great grandmother used this as her suitcase. She had, I think, 6 kids that she lived with for 2 months at a time. She would just load her dresser on the back of the wagon and haul it to the next house. My parents held it in their guest room for a while and when I mentioned I'd like to have it "one day" they brought it up!

All that's left for this room is to hang curtains, get a duvet for our duvet cover (we did that a little bass-ackwards, but that's ok!), and I have a short list of small accessories (like an old fashioned alarm clock) to get.

Friday, October 8, 2010

Show Me Your Life - Kitchen

I've been caught now. The kitchen is one of a handful of rooms that I haven't done much of anything to. Actually, some of the photos I'm posting are from when we moved in! But that's OK. I have plans. I just need some cash-ola, then some time to actually do what I want.


Sink area (move-in picture--it hasn't changed and the sink is a disaster right now!)


Opposite of the sink


Breakfast nook. Please excuse the tape of the floor--our builder came through for a one-year inspection and we had some grout replaced. Also, excuse Mister's tail :)


Butler's pantry, a.k.a. the bar. You'd think we drank a whole lot more than we actually do to see this picture (especially if I opened the cabinets!)


Being a new construction home, we got to pick pretty much everything except the cabinets (which had already been ordered when we came along). Luckily, we liked them! We got to pick the tile for our back splash, the sink faucet, and our appliances. We also got to pick all of our lighting fixtures, but we chose to save money and just go with the basic already included package. Mostly because we knew we could buy different fixtures for less and install ourselves (which is what we did with the ceiling fans). However, honestly, I don't really mind any of our light fixtures. I'd like to eventually get rid of the fluorescent light in the laundry room. Otherwise, I'm pretty happy. The one thing I WOULD like to do with the lights is change the shades over the table. Lowes sells what I want for pretty reasonable (compared the the cost of replacing the fixture itself).

Saturday, October 2, 2010

My First Project

At long last, the stars have aligned and I actually got the console table I built decorated. This was my first foray into building something with power tools. And I still have all my limbs! I found the plan at Knock-Off Wood. Dad loaned (and has since gifted) me his nail gun and air compressor and Husband found a deal of the day on Amazon for a miter saw 50% off. I also had some gift cards saved up, so this project cost about $100, for power tools and lumber. When I went to by lumber, the total came at $70, but I was buying for two separate projects (the other of which will get revealed in a little bit). My point in all that rambling is that, assuming you have the basic
power tools, this project would probably cost about $30.


Building: The directions were very clear about what goes where and how to attach it. Ana includes pictures for each step, which is great for us visual learners! However, I recommend NOT resizing the pictures to print. In trying to save paper, I made the pictures too small and couldn't really see what I was supposed to do. As a result, the bottom support isn't attached where it is supposed to be. I was wondering why some of my pieces were too long! I think it still turned out OK.
Also, make sure you take a tape measure with you to Lowe's (or be prepared to do some math BEFORE you start). My 1x12 actually measured 11", therefore, when I went to attach the top (the very last step--ARGH!), I had a half inch sticking out from the bottom on each side. Since I don't have a circular saw (yet), I had to cut 2-6" pieces the old fashioned way and sanded it almost even. You can only tell by looking directly over it, so I think I'm good. Also, because I had to cut apart my 1x12, I cut out the last step for the top top. I don't think it suffered!


Finish: I stained it in Minwax walnut and used 2 coats of Minwax polyurethane semi-gloss.


I've actually since bought a buffet lamp, but here's the table in all of its glory! I'd love to get a fall table runner, but I think the sideboard in the dining room may win out on getting that first.

Thank you so much, Ana, for giving average people with small budgets the confidence to create nice things themselves. Despite the issues (which were all noob mistakes), I had a blast building this and look forward to working on the Rustic Modern Console table for our entry way (as well as plenty of other projects)!

Friday, October 1, 2010

Show Me Your Life - Dining Room

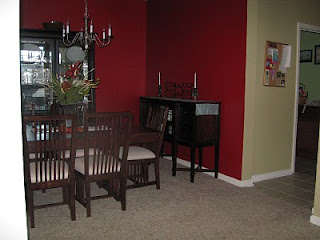
A long time ago, I mentioned I painted the dining room RED. I never got around to posting pictures because we took our sweet time buying furniture. It's still not decorated as well or as much as I'd like, but it's another room that's so close to finished, I don't feel bad participating once again in Kelly's Show Us Your Life series.


Our side board with tea cups and saucer


Our beautiful wedding china on display


The whole room (an part of the butler's pantry) today, mostly decorated


The whole room from another angle.

I still want something on the wall over the side board. A rug would be nice. And the candle sticks don't really fit the color scheme of the house (I promise I do actually have one), but my grandmother bought them on her trip to Latvia in 2007, her first since WW II. They're a little special :)