Showing posts with label building. Show all posts

Saturday, October 19, 2013

Entry

I logged on and fully expected that I hadn't posted here in at least a year. Nope. 7 months. #winning.

Several projects I wanted to update my sister on (Since she asked. Hi Mel!), so for now, I'll just do the biggest one. The longest one. The one I'm not convinced is actually done yet. The entryway.

(before)

(during)

(after)


That stupid bench has become a thorn in my side. I'm letting it be for now, but I built it and the legs bowed when sat on. Which is kind of the point of a bench. I tried adding a support in the middle and that was a massive fail. So I disassembled it and it sat in the garage all summer long. I've finally gotten into a routine with my work schedule, so I worked on it the past couple of weeks and abandoned the idea of the original turned legs for simple straight ones and also mitered a frame for it. I still think it wobbles, so we will see. But I do really like how it looks. I have buttons I plan to sew on the pillows. Just got too excited to get the bench in. That also explains the pictures. I keep forgetting to take pictures during the day, so excuse the lighting. And generally terrible pictures in general. They don't at all show what I did.

Since the table had to go for the bench, Mister's walk supplies needed a spot. I used this idea from Pinterest. He has a hook for treats, which need to start being taken on our walks for when the neighborhood kids want to pet him. There's also a hook for his coat, his dry off towel (which was the real need in the entry. We previously just left the towel in a heap on the floor), flashlight, and leash/collar/harness. Who knew such a little dog needed so much stuff!


Monday, October 22, 2012

Oops, I Did It Again: Another Building Project

I have reclaimed my garage parking spot after my latest building project: a fold-down sewing table, plans courtesy of Ana White.  I've needed this for some time now, mostly because there's not a single pair of pants that enter my home and get put away on my side of the closet or in my dresser that DON'T need alterations. And yes, Stacey and Clinton say alterations are small potatoes (I paraphrase...I'd kind of pay money to hear Stacey or Clinton say that, though) in the grand scheme of investment pieces, when it's a $10 alteration over 8, 9, 10+ pairs...that's a much larger investment! And no, heels don't cut it.

So yes, sewing table.

In case you're too lazy to actually look at the plans, there is essentially a base unit in the middle and fold down leaves on either side. The legs fold under and the weight of the leaves hold them in place.  This picture was taken after I attached the legs on one side, to make sure I did those right!


And the finished product:
                                    

I painted the entire thing with leftovers from our bedroom (Sherwin William's Orient Blue color matched by Valspar). Then, I randomly taped off stripes and painted the same green as the laundry room (the color name escapes me, but it's Valspar) and "Wet Path" by American...something or other. The Hubs actually gets credit for the stripes idea. I was debating paint or stain and his suggestion was paint and "some kind of graphic print, like stripes or checkerboard." I actually debated argyle for a while, but decided that was way too much effort. And for the record, random stripes on a table are much easier than on a bedroom wall.

Just a larger angle:
                                 
My proudest moment with this project (other than actually getting the base unit to be square) is creating the ironing board top. See the paisley on the left?

Close up. You can't tell, but the green background matches the green stripes.

I got the brilliant idea that ironing is a large part of sewing properly. While I don't do sewing projects "properly," I figure I'll be doing more and it will probably eventually necessary. I was browsing Pinterest one day (seriously, I don't know I've had a single original idea since that thing came around) and came across this gem. After a little Googling, since the original pin, nor the source actually describe the process, I discovered all iron board padding really is is batting and fabric. The fabric needs to be 100% cotton, because of the heat from an iron (any kind of blend will scorch eventually). I doubled up the batting (which was actually already done for me in packaging) and bought a yard of fabric (perfect for this project's measurements) and a light duty staple gun, since I was in the craft store already anyway. I started in the middle of one side and worked my way out, pulling the fabric and batting tight and stapling.  Mister supervised.

Then, when all is said and done, the table folds up and rolls out of the way:


One side of storage: the basket holds thread, buttons, and other sewing notions. This is already actually outdated. I started switching baskets around and now have those things in the striped bin seen on the top shelf in the above photo. It was actually generally my inspiration for the stripes.  My extra fabric is on the bottom shelf.

Storage on the other side: Sewing machine manual, extension piece thingy I haven't used, and on the bottom is a canvas drop cloth that will turn into curtains for the master bedroom.

That's what I've been doing, instead of working on a presentation for class.


Friday, October 28, 2011

Projects and Priorities

I don't have any new projects to share. There's a month left of my classes, one of which has been kicking my butt. Just when I think I've figured out the professor and what she's looking for when she grades, she changes it. I'd love to make it out of this semester with my 4.0 in tact, but I'm doubting that.

Anyway, I have a point to this post, I promise! The other day, Ana White posted about impending doom, aka snow. While my situation is much less dire that trying to put up a roof before snow falls, my garage isn't exactly heated. Building project time is getting limited! The problem is, I've a list of ideas a mile long, so I need some help prioritizing (get it? Projects and priorities! My titles don't lie).

Project 1) Master Closet reboot.


I love our closet. It's so massive. Husband and I have more than enough space to keep all hanging clothes, sweaters, shoes, purses (which my collection is admittedly sad...and Husband doesn't have a collection at all :)). I would, however, like to paint it. It's the color we picked when we moved in and I'm a little tired of it. I want to paint the closet and the "toilet room" of the bathroom the same color-a shade of green. In painting the closet, I'd LIKE to reconfigure things a tiny bit. With the installation of our entertainment box, We had to get one of the shelves cut in 2 pieces. I rehung the new excess on the same wall as the door. I'd like to move that to underneath the back section, creating 2 sections for pants and tops (Husband's side is already like that). I have 2 building projects: a shoe cubby like this and a laundry sorter like this.

Except for the 2 building projects, everything can be done in warmth. However, I'd like to change up how I do laundry and the laundry sorter plays a big part in that.

Project 2) Entryway reboot


This is really just straight up building projects. Eventually I want to paint, just not ready to tackle the huge area our entry opens up to :). We want a bench where the small table is. Something to sit and and put on shoes before we walk the dog. Something along these lines, except with a cushion and without the baskets. With under the bench open, we can keep our dog walking shoes, so that's out of the way. I also want to build a small table (OK, this one) to keep Mister's harness and leash, our iPods and arm bands, spare keys, blah blah blah.

We also want to buy an umbrella stand (I will walk that dog in ANYTHING...including apparent tornado warnings) to keep that mess off the floor/drywall).

Project 3) Sewing table

This is the last project for our office redo (well, it was never done to begin with, so "do"). I've got several projects planned, like a cover for Mister's crate that actually goes with our room (not that I don't LOVE his Auburn blanket), a cushion for said entry bench, and the ongoing battle with hemming my pants. Why I want to push this up in priority is because of Cori. She's also petite (under 5 feet people are the coolest. It's no lie) and she sews a lot of her own clothes, especially skirts. I would need a refresher course in measuring and altering patterns (I love you, Mom! or perhaps an actual class when my time allows), but I could knock out a large portion of the "needs" for my closet for much less than I would otherwise.

This is the part where people comment with their number choice (like on Love Connection--best part of being hom sick from school in the 90s!). I intend on all of these projects getting done at some point, but I figure I can really only feasibly build the parts for one before I can't stand the freezing garage...and no, we don't have a space heater :)

Saturday, September 24, 2011

Work Bench

I figured I'd better blog about my work bench now before I have to work on the multitude of papers I have due this week :)

So you've already seen the peg board. But what's peg board without a space to work? I have been completely and totally spoiled by the house I grew up in. Our garage took up half of our house's total footprint. In my mind, a 2 car garage should have room to comfortably park 2 cars (or SUVs...or vans), have plenty of space for storage, and still have room for a workshop.

Unfortunately, that's not reality in newer houses here in Lexington. My mom stumbled upon this plan for a work bench from Family Handyman online. What I love is that it utilizes the space between the wall and garage door track. I also love the fold-out work space option. I haven't done this part just yet, but plan to. There's plenty of ways to customize it. Since I don't have a table saw, I didn't need that part. I also didn't build the roll out drawers (yet) or the slide panel. I also shortened the entire thing by about 2 feet as that entire length would have taken up most of my garage wall.


Here's my bottom shelf. This measures 8 ft x 17 inches.


Here are the two work tops. The larger one (on the left) measures 6 ft x 20 in. and the smaller one (on the right) measures 4 ft x 20 in. The gap is 24 in. I chose to leave the large space under the longer top in case I ever did get a table saw and I can build the roll out section. Or if I ever get a shop vac, that can easily fit under there as well.


Here it is assembled, minus the actual top.


And the finished product (you can't tell, but there is actually plywood on top now. I have hooks to actually hang the saw horses. Also, I plan on selling the cabinet on the far right.


This section is mostly to support lumber being cut by the miter saw. I also hung my clamp collection, hammers, hand saw, and other miscellaneous stuff. I plan on building a shelf for the air compressor, so that space will eventually open up. I'm not sold on keeping the drawers, but they're kind of handy right now for loose screws, pencils, and other small things that wouldn't stay in the basket on the peg board.


This is the miter saw bay. It's not totally level (which I'm not sure how that happened since both tops are level themselves and to each other), but it's nothing a short trip to Lowe's for shims can't solve. Underneath is the lower shelf with my other power tools (nail guns, drill, circular saw, sander). On the garage floor are all of my small wood scraps (i.e. not the large pieces of ply wood).


And this is the main work area. This is where the fold-out table will go. The peg board holds my basic building tools and a magnetic strip for the screw drivers. I've also got all of my painting supplies around here.

So that's what I've been up to. Now that this is finished, I'm anxious to get to some of my other projects like a sewing table (so I can start on sewing projects like a new crate cover for Mister), a bench and/or console table for our entry way, and a laundry basket dresser so we can pre-sort laundry. I also need to do some re-tooling on the wood box I had built for the patio. This is, of course, as we enter life's busy season with football, work, school, fall trips, and the holidays will be here before you know it! Where's the slo-mo button on this thing?

Sunday, May 29, 2011

During

The office remains a work in progress. The good news is it's very close to being done. The bad news is that means it's totally torn apart and there's not a whole lot to show for our efforts (which then results in another long hiatus from the blog). Part of the delay was waiting for the weather and my schedule to clear up long enough to work on the second drawer unit. It finally got done:


I also found some new curtains (which you can just see behind the futon) on clearance at Lowe's. They're blackout curtains which is great since the window is the last one that needs blinds. The only part I dislike is that I had to cover up some great details around the window, but the room gets direct sunlight for most of the afternoon and I didn't want the stuff I have sitting on top of the ledge across from the window getting any more faded.


Inside the drawer. Since this photo, we have gotten a third box for our files. I also hope to get a couple of magazine holders and store Adam's collection in here.

In other news, I've also been working on a couple of yard projects.


I planted some hosta and spread around some new dirt in the new flower bed. Bugs have eaten some of the leaves, but I can never catch any in the act to see what it is so I can use a proper repellant. Hopefully they don't actually do too much damage. I also hope to get some impatiens in the ground before too long.


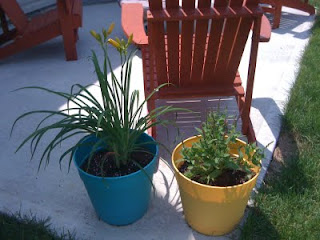
In trying to bring color to the yard, I went out and bought these two planters from Wal-Mart and finally got some plants to put in them. I've got a day lilly in the turquoise and I think a butterfly bush...I forget what the tag called it, but it looks like a butterfly bush in the yellow.

I still need to spread the leveling sand and set the edger stones around the bed and spread dirt around the irises that decided to bloom (and are now all dying...just the blooms though...Shouldn't be concerned, right?). I'd love to plant a few more flowers and maybe add a wind chime or some other fun things and the back yard will be almost complete!

I've finished a few projects, yet somehow a thousand more have been added to my list. How does that work?

Sunday, April 24, 2011

Life and Drawers

I mentioned yesterday that life had been a run-away train. Between the house, husband, dog, work, and church, it's a wonder I actually have time to watch TV :) It's about to get a little crazier, too. I don't remember if I mentioned this or not on the blog, but I'm going back to school. The state of Kentucky requires me to have 15 hours towards a Masters to keep my teaching certificate current. I have until next year to get that done. Tomorrow, I will begin my first summer course (yeah, a summer term that starts in April. Whatever). Luckily, I only have to be on campus the first day and the rest is online. For the second summer session, things will get very interesting as I'm taking 2 classes and I'm not sure how much will be online vs. on campus. BTW, I'm obviously getting a Masters in Education, but I will take a few additional hours to have an endorsement as a Reading/Writing Specialist. I'm happy to have a conversation about why!

Anyway, I told you all that so that I can be even more excited to show off my latest project:


No, I did not built that entire thing. No that is not one solid piece. The top section is actually half of a pair of bookshelves my daddy built me when I was little. We've had them stacked on top of each other in the office and they held canvas bins with my crafty supplies (I looked for a picture, but I totally can't find one with the bins). When we started plotting what we actually wanted to DO with the office, we took a few measurements. Turns out one on its side measured the same as the walls on either side of the windows. Thing was, they're still only a few feet tall and we've got some high ceilings. Plus, we were utilizing the tops to hold picture albums and scrapbooks. Our solution? Huge drawers. I thought I may be able to make up how to build it. After all, it's a big box with one side open with another, slightly smaller box without a top stuck inside. However, I felt the need to browse Ana White's plans just in case.

My box is basically the Braden Entryway Drawer Bench, modified for what I needed. I did use 1x12s for the drawer sides and back, but didn't do essentially steps 3 and 4. In step 2, the bottom part is actually at the bottom. Also note, in step 8, she talks about installing the drawer slides, but doesn't include them in the shopping list. The comments also have a few comments about the drawer slides and I agree that a single under-mount is wobbly. I wonder if a side mount would be better? I'll pick up 2 more slides on my semi-weekly trip to Lowe's and go ahead and install 2 for the second drawer and hopefully get around to installing a second in the first (that makes sense, right?).


The rest of the plan includes moving these books to the sideways bookshelves and selling this bookshelf (or at least possibly moving it to the guest room). This wall will get shelves on the wall for my crafty bins and also a secretary-style desk for me to do homework/crafty projects.


This wall will stay relatively unchanged. The lamp will get moved for another drawer/bookshelf unit. The file cabinet and desk/chair will get sold. The drawer on this side will get inserts for hanging files and will hopefully have room to hold old magazines, notebooks, etc.


This gives a better idea of how tall the unit actually is. Not quite as ginormous as it looked at first! Although the drawer measures 29" across and is 23" front to back (deep? wide?)


Room for all of my scrapbooks!

After the second drawer gets built (the rain lately makes it tough to get spread out and saw), the next big project will be a garage work bench and storage!

Wednesday, February 16, 2011

Happy Valentine's Day!

I know, I know, I'm a few days late. But, honestly, did y'all really expect any different from me? :)
Husband and I celebrated on Saturday (the whole "holiday during the the week" thing should really be eradicated) by going to our traditional restaurant. He's brought me here every year since we were officially dating (he lucked out the first year as we were seeing each other, but not official on Valentine's Day). Dinner was, as always, delicious.
The actual day wasn't anything spectacular. I surprised him with cards and chocolate from both me and Mister. They were laying on our key table when he left for the morning. He had a card and chocolate for me when he got home from work. Curiously, we both exchanged chocolate with puppies on the boxes...I wonder why we were thinking dogs? ;)
As I mentioned last time (last month...same thing), not a lot of things are getting done around the house. We did spend a lot of time in the office last Saturday and started brainstorming. We're now going in a totally different direction.
Instead of building more bookshelves, we're taking two that we have and turning them on their sides. Before you scratch your head and say, "Huh?" allow me to explain. I've had these shelves since I was little. My daddy built them for my books and toys, so they have many different sized openings, most of which are perfect book-size, regardless of which way they're turned. As fate would have it, they also measure exactly the same for the wall we want to put them on (either side of the window). The plan now is to build a base drawer for them to sit on. The shelves will only rise about 4 feet, so I'm going to build 2 drawers (one for each side), about 1.5 feet high and just over a foot deep. One will house my picture albums and scrapbooks and the other will become the new file cabinet. The futon will either stay where it is, go where the shelves are now, or go away entirely. We're not quite ready to write up a post for Craigslist just yet, as the futon was handy during the holiday season. We'll see what it looks like when we make the other changes first.

The desk will most likely end up on Craigslist, though, in favor of a new, smaller one to be placed on the wall where our dedicated bookshelf is (which will also likely end up on Craigslist).


We plan to put up shelves over the desk to house my crafty stuff (now that it all has pretty storage anyway). I'd also like to build a table for my sewing machine, since it's a pain in the butt to drag out and put back. Husband has grand plans of getting a treadmill or exercise bike and work out in the mornings. I wouldn't hold my breath on that one ;)

Saturday, January 8, 2011

Plans

Ugh! Has is really been over a month since I last updated? I would say 2011 will be different, but I've had this blog for over 2 years. It won't get better. There is a little bit of hope though, because I have several projects planned for 2011. Unfortunately, they won't really get started until early-spring.
Until that happens, I can share what I'm dreaming up FOR said projects ;) I've mentioned Ana White's website several times. So far I've built this headboard:


and talked my dad into building me these nightstands:


(By the way, I added some curtains in this room, too! One day I'll actually take a picture of it!)


A few days ago, she had a post about Google's SketchUp, the software she uses to design her plans. Naturally, I had to play around with it! After my initial learning curve (and it was a pretty big curve. I had given up last night, but decided to try one more time today), I sketched up my plans for a workbench for the garage:


Ignore SketchUp Susan standing IN my workbench. I am still learning and literally figured out about 5 minutes ago that there were more than 4 template options :/

Anyway, my plans aren't nearly as informative as Ana's so I'll just have to explain them. I plan on an 8 ft. workbench. I know, it's crazy long, but since studs come in 8 ft. lengths, it's kind of perfect. Second, it's only going to be 21-22" deep. That's crazy shallow, but we just don't have the extra room in the garage for wider without sacrificing a parking space. And since it snowed about 2 inches last night, neither one of us are willing to give up our indoor parking spots. It should, however, be deep enough to hold my miter saw (which is all I cared about). I also plan to put casters on the bottom, so that when I am working (I do actually sacrifice my spot for that), I can pull it away from the wall for easy clean-up. I love the idea of the bottom shelves to hold my new circular saw and those other odds and ends that are too big for the pegboard and compressor shelf. I might end up just building the miter saw it's own bench and build a separate bench for clean work space...Winter is just beginning, so there's no telling what this will look like in a couple of months!

So that's my big plan for 2011. I've got a few other projects for the garage, including mounting pegboard for the smaller tools and building a shelf for the air compressor. I also plan to build these bookshelves for the office to give us a little more room in the garage. I have a few other smaller project hopes, which may or may not include a trip to Ikea (OK, probably, may or may not include a few gallons of paint (OK, probably), and possibly may involve me departing from my beloved Lowe's for it's big orange competitor because I REALLY want these chairs. We shall see how it all plays out!

Friday, October 29, 2010

Show Me Your Life-Guest Rooms

I've been on hiatus the past couple of weeks from Kelly's Show Me Your Life series. Mostly because it's been the office (which I'm not a huge fan of, decor wise. I'm just uninspired for it) and kids rooms (which we don't have any kids, therefore no kids rooms!). But this week is guest rooms and I LOVE ours! We've put a lot of work into it and I think it's turning out pretty special.


This is our guest bed. My dad built the night stands from this Knock-Off Wood design. I supervised one of them, mostly to learn about using a nail gun. My observations paid off because not only did I build the console table I shared a little while ago, but I also built the headboard! The headboard is from this Knock-Off Wood plan, except I ONLY built the headboard part. We have a frame already and I didn't really want the footboard.


Better look at the headboard


And a close-up of the nightstand. Forgive the blurry, yellow tinge. I am NOT a photographer, so I don't know how to adjust for different lighting.


Opposite from the bed is a dresser and quilt with stand. The stand was a Christmas present last year, so I had a better way of displaying the quilt. This quilt is pretty special. My great-aunt's great aunt handmade this quilt when she was in her 80s. It laid on the bed of my great-aunt (who was more of my grandmother, but that's a long story) and was one of the things she brought from home to her nursing home. It was on our guest bed for a time, but I was always worried something would happen to it.
The dresser also has a story. My several-times-great grandmother used this as her suitcase. She had, I think, 6 kids that she lived with for 2 months at a time. She would just load her dresser on the back of the wagon and haul it to the next house. My parents held it in their guest room for a while and when I mentioned I'd like to have it "one day" they brought it up!

All that's left for this room is to hang curtains, get a duvet for our duvet cover (we did that a little bass-ackwards, but that's ok!), and I have a short list of small accessories (like an old fashioned alarm clock) to get.

Saturday, October 2, 2010

My First Project

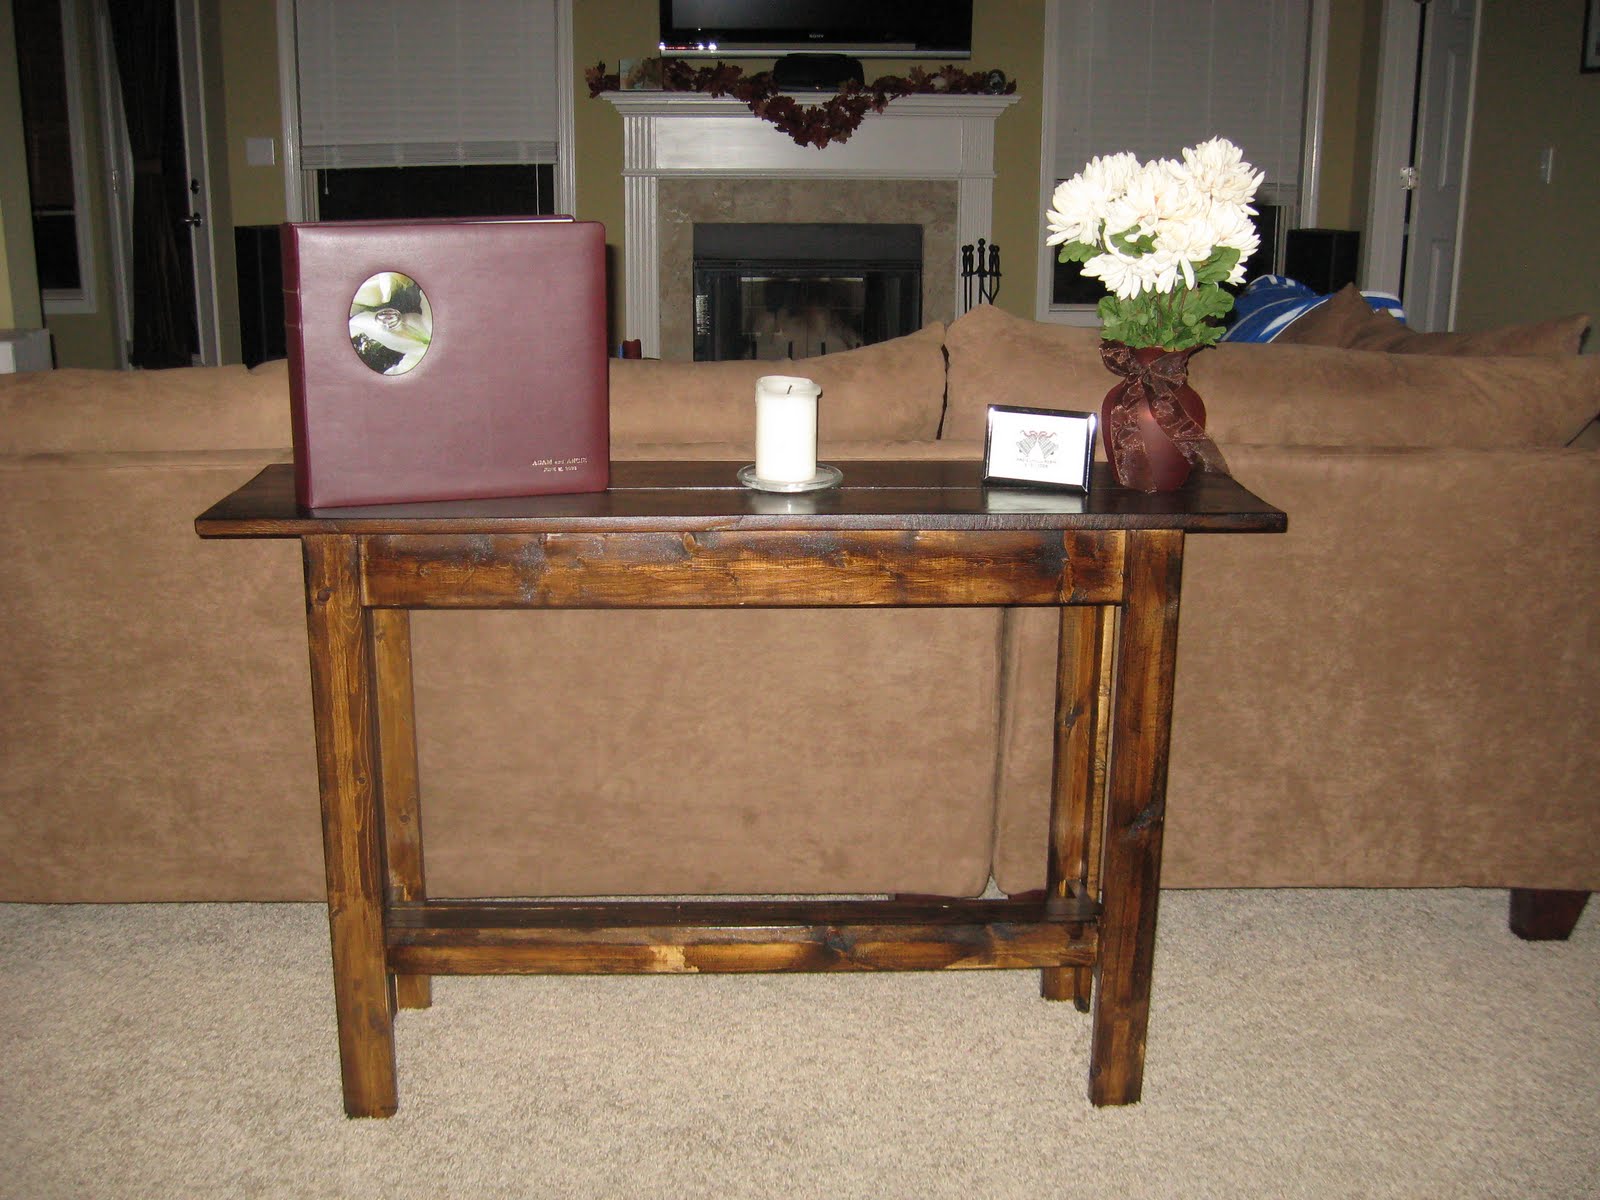
At long last, the stars have aligned and I actually got the console table I built decorated. This was my first foray into building something with power tools. And I still have all my limbs! I found the plan at Knock-Off Wood. Dad loaned (and has since gifted) me his nail gun and air compressor and Husband found a deal of the day on Amazon for a miter saw 50% off. I also had some gift cards saved up, so this project cost about $100, for power tools and lumber. When I went to by lumber, the total came at $70, but I was buying for two separate projects (the other of which will get revealed in a little bit). My point in all that rambling is that, assuming you have the basic
power tools, this project would probably cost about $30.


Building: The directions were very clear about what goes where and how to attach it. Ana includes pictures for each step, which is great for us visual learners! However, I recommend NOT resizing the pictures to print. In trying to save paper, I made the pictures too small and couldn't really see what I was supposed to do. As a result, the bottom support isn't attached where it is supposed to be. I was wondering why some of my pieces were too long! I think it still turned out OK.
Also, make sure you take a tape measure with you to Lowe's (or be prepared to do some math BEFORE you start). My 1x12 actually measured 11", therefore, when I went to attach the top (the very last step--ARGH!), I had a half inch sticking out from the bottom on each side. Since I don't have a circular saw (yet), I had to cut 2-6" pieces the old fashioned way and sanded it almost even. You can only tell by looking directly over it, so I think I'm good. Also, because I had to cut apart my 1x12, I cut out the last step for the top top. I don't think it suffered!


Finish: I stained it in Minwax walnut and used 2 coats of Minwax polyurethane semi-gloss.


I've actually since bought a buffet lamp, but here's the table in all of its glory! I'd love to get a fall table runner, but I think the sideboard in the dining room may win out on getting that first.

Thank you so much, Ana, for giving average people with small budgets the confidence to create nice things themselves. Despite the issues (which were all noob mistakes), I had a blast building this and look forward to working on the Rustic Modern Console table for our entry way (as well as plenty of other projects)!